Two commonly used products, joint compound and spackle, are often thought to be interchangeable. However, despite their superficial similarities, they serve distinct purposes and have different properties. Joint compound, typically used for larger scale projects like taping and finishing drywall joints, contrasts with spackle, which is ideal for smaller, quick repairs such as filling in nail holes or minor wall imperfections. Understanding the differences between these materials is crucial for DIY enthusiasts and professionals, as choosing the right one can significantly impact the quality and durability of your work. This article aims to demystify these two compounds, highlighting their composition, applications, and best use cases, thereby equipping readers with the knowledge to make informed decisions for their project needs.
Is Joint Compound The Same As Spackle?
No, joint compound and spackle are not the same. Although they’re both used in wall repairs, they have distinct differences and applications. The joint compound, also known as drywall mud, is primarily used for larger projects like finishing drywall seams or skim coating. It’s available in larger quantities and requires a longer drying time. On the other hand, spackle is a lightweight compound designed for smaller, quick repairs such as filling nail holes, small cracks, or minor imperfections on walls. It dries faster and often comes in smaller containers. While you might use spackle for quick touch-ups, joint compound is better suited for more extensive wall repairs and finishing work. Choosing the right one depends on the size and nature of your repair project.
Importance Of Understanding The Difference
Understanding the difference between joint compound and spackle is essential for anyone involved in home repairs, construction, or renovation projects. This knowledge significantly impacts the quality, efficiency, and durability of wall repairs and finishing. Here are several reasons why distinguishing between these two materials is important:
Appropriate Application: Joint compound and spackle are designed for different types of repairs. Joint compound, or drywall mud, is ideal for larger projects like taping and finishing drywall seams or skim-coating entire walls. It’s formulated to adhere well over large surfaces and to fill in seams or gaps between drywall panels. In contrast, spackle is best suited for minor, quick repairs such as filling nail holes, small cracks, or minor imperfections. Using joint compound for small repairs can be overkill and less efficient, while spackle may not provide the strength and adhesion for larger drywall projects.
Quality Of Finish: The choice between joint compound and spackle can affect the final appearance of the repair work. Spackle is generally easier to apply and sand, making it ideal for achieving a smooth finish on minor repairs, especially when painting over the area is required. On the other hand, the joint compound is more suitable for creating a seamless finish over larger areas, essential for professional-looking drywall installation and repair.
Efficiency And Time Management: Each material has different drying times and workability. Spackle typically dries quickly, allowing for faster completion of small repair jobs. The joint compound takes longer to dry, which can benefit larger projects as it allows more time for application and smoothing. Understanding these properties helps in planning and executing repair work more efficiently.
Cost-Effectiveness: Using the correct material for the job can also be more cost-effective. Although more expensive per unit, Spackle is typically sold in smaller quantities, making it a more economical choice for minor repairs. A joint compound is more affordable for covering larger areas, providing better value for extensive work.
Longevity And Durability: The durability of the repair work depends mainly on using the right product. A joint compound is generally better suited for enduring the stress of larger wall areas and the wear and tear that comes with them. While durable for minor fixes, Spackle may not hold up well under larger-scale or high-traffic area stress.
Safety And Health Considerations: Different materials can present health risks, especially sanding. Joint compounds can generate a significant amount of dust, requiring proper ventilation and respiratory protection. Spackle typically produces less dust. Knowing which product to use can help take appropriate safety measures to minimize health risks.
Professional Standards: For construction and repair professionals, using suitable material is not just a matter of efficiency and aesthetics but also of adhering to professional standards and ensuring client satisfaction. Incorrect material choice can lead to subpar work, impacting reputation and future business.
Environmental Considerations: Each product has different environmental impacts, from the resources used in manufacturing to the potential for off-gassing. Understanding these differences can help in making more environmentally responsible choices.
Ingredients Of Joint Compound
A joint compound, commonly known as drywall mud, is used to finish drywall joints and surfaces in construction. The ingredients of joint compounds are carefully selected to provide the right consistency, ease of application, and durability. Here’s a breakdown of the typical ingredients found in joint compounds:
Gypsum:
The cornerstone ingredient in most joint compounds, gypsum (calcium sulfate dihydrate) is a naturally occurring mineral. When ground into a fine powder and mixed with water, it forms the base of the joint compound. Gypsum provides the necessary bulk and structure to the compound, and its natural properties contribute to the ease of sanding once the compound dries.
Water:
Essential for creating a workable paste, water is added to the powdered gypsum to achieve the right consistency. The water content is crucial as it directly affects the drying time and the ease of application of the compound.
Limestone (Calcium Carbonate):
Often included in the mix, limestone improves the workability and helps control the joint compound’s setting time. It contributes to the overall durability and hardness of the dried compound.
Polymers And Binders:
These are critical for improving the adhesive qualities of the joint compound. Polymers such as ethylene-vinyl acetate (EVA) or other acrylics ensure the compound adheres well to the drywall and other surfaces. They also add flexibility to the compound, reducing the likelihood of cracking as it dries and ages.
Preservatives:
The inclusion of preservatives is particularly important in pre-mixed joint compounds. These additives help prevent mold and mildew growth and extend the product’s shelf life. The wet mixture could be prone to spoilage and bacterial growth without preservatives.
Dust Control Additives:
Some modern formulations of joint compounds include additives designed to reduce the amount of dust generated during sanding. This is a significant advancement in health and safety, as it minimizes the inhalation of fine particulates.
Setting Compounds Ingredients:
Additional chemicals that cause the compound to harden chemically are included for setting-type joint compounds rather than just drying out through the evaporation of water. These chemicals can vary but often include substances like potassium sulfate or other accelerators that react with the gypsum to set the compound quickly.
Recommended Techniques For Applying Joint Compound
Applying joint compound, a critical step in achieving smooth, finished walls and ceilings, requires careful technique and attention to detail. The process typically involves several stages: applying the compound, smoothing it, and then sanding it once dry. To achieve the best results, it’s important to follow certain recommended techniques.
Firstly, preparation of the surface is key. Ensure the drywall is clean and free of dust and debris. Any holes or major imperfections should be addressed before applying the joint compound. If you’re working on new drywall, it’s crucial to tape the drywall joints first. Use drywall tape over the seams and apply a thin layer of compound over the tape, using a drywall knife to smooth it out.
Start with a small amount on a drywall knife when applying the joint compound. Apply it to the wall or ceiling using even upward strokes for walls or smooth, elongated strokes for ceilings. The key is to apply a thin, even layer; too much compound can be complex to sand and may take longer to dry.
After the first layer is applied, let it dry completely. Depending on the humidity and temperature, this can take anywhere from a few hours to overnight. Once dry, lightly sand the surface to remove any ridges or bumps. Applying a second and sometimes even a third layer is often necessary, especially if you’re aiming for a perfectly smooth finish. Repeat the application and sanding process for each layer, ensuring each layer is thinner than the last and extends a few inches beyond the previous layer’s edges. This feathering technique helps blend the compound seamlessly into the wall.
Use a corner trowel for a clean, sharp finish for inside corners. Apply the compound to both sides of the corner, and then smooth each side one at a time with the trowel. Be careful not to disturb the other side as you work.
When working on outside corners, use a metal or plastic corner bead. Apply the joint compound over the bead, smoothing it to ensure a crisp, straight edge. This also helps protect the corner from dings and bumps.
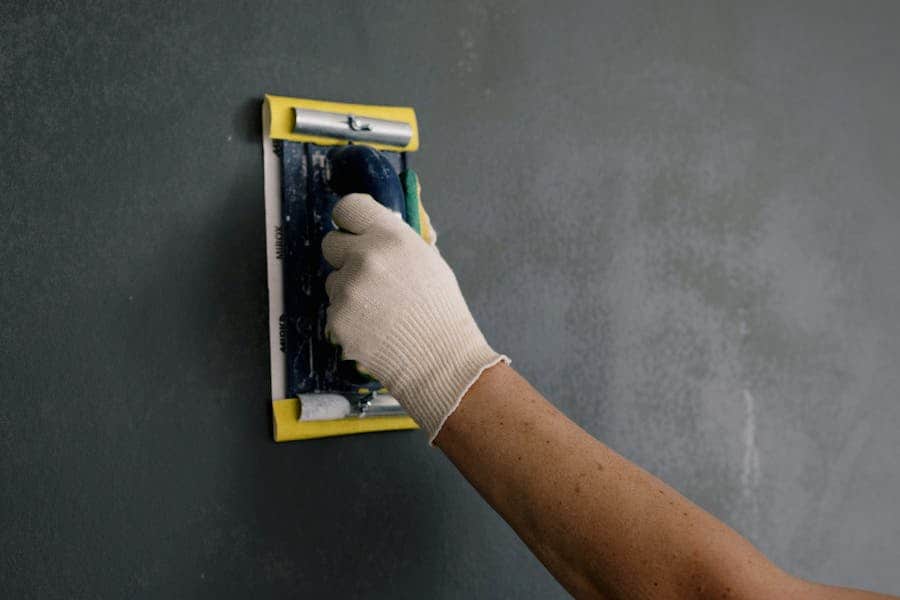
Lastly, once you have applied the final layer and it has dried thoroughly, sand the area with fine-grit sandpaper or a sanding sponge for a smooth finish. This step is crucial for preparing the surface for painting or wallpapering. Remember, the quality of the finish after painting is directly related to the smoothness of the joint compound application, so take your time and focus on achieving a smooth, even surface.
Recommended Techniques For Applying Spackle
Applying spackle is a common task in home repair, often used for filling small holes, cracks, and minor imperfections on walls. The process is relatively straightforward, but specific techniques are recommended to achieve a smooth, unnoticeable finish.
- The first step in applying spackle is ensuring the surface is clean and dry. Remove any loose paint, debris, or dust from the area to be repaired. This helps the spackle adhere better and provides a smoother finish. If you’re dealing with a hole or a deep crack, slightly undercut the edges with a putty knife to create a space for the spackle to lodge and hold.
- Once the surface is prepared, take a small amount of spackle on a putty knife or a similar tool. If you’re filling a hole, press the spackle into the hole, ensuring it’s fully packed in. For cracks, work the spackle into the crack with the knife, applying enough pressure to push it in while smoothing it over the surface.
- After applying the spackle, smooth it out with the flat edge of your tool. The aim is to make the spackle flush with the surrounding surface. Wipe away any excess material around the edges to blend it seamlessly into the wall. For larger patches, apply a second layer of spackle after the first one has dried. This ensures a smooth, level finish.
- Drying time is crucial with spackle. Allow it to dry thoroughly before proceeding with any sanding. The drying time can vary depending on the thickness of the application and the environmental conditions, such as humidity and temperature. Spackle usually dries relatively quickly compared to joint compound.
- Once the spackle is dry, lightly sand the area to smooth out any ridges or bumps and ensure the repair is flush with the surrounding wall. Use fine-grit sandpaper and sand gently to avoid gouging the repair. The goal is to make the spackled area indistinguishable from the rest of the wall.
- For more extensive repairs, it might be necessary to prime the spackled area before painting. Priming helps to seal the repair and ensures that the paint adheres evenly. It also prevents the spackle from absorbing the paint differently than the surrounding wall, which can lead to a noticeable patch.
Bottom Line
While joint compound and spackle may appear similar and are sometimes used interchangeably in wall repair and finishing, they are distinct products designed for specific purposes. Joint compound, or drywall mud, is best suited for larger projects such as taping and finishing drywall seams and covering larger surface areas. Its composition and drying time make it ideal for more extensive and durable repairs. On the other hand, Spackle is designed for quick, more minor repairs like filling nail holes, small cracks, and minor wall imperfections. It dries quickly and is easy to sand, making it convenient for touch-ups and minor fixes.
