Once you’ve finished your woodworking project and have begun to clean up, you might discover some unwanted marks. It could be as minor as a few splinters or as major as burns from a drill or laser. No matter what the size of the mark, it’s important that you know how to get burn marks out of wood. These mistakes can happen to any woodworker. Even the most experienced makers will at some point leave their workshop with visible scorch marks. Fortunately, these blemishes are rather easy to correct with the correct technique and tools. Read on to discover how to get burn marks out of wood!
How To Get Burn Marks Out Of Wood?
Steam cleaning
Steam cleaning will remove the burnt material from the surface, but the more important benefit is that it’ll also clean the pores of the wood. This will help to prevent any water stains from forming. One thing to keep in mind is that some woods are more delicate than others. For example, if you’re dealing with a piece of pine, you’ll want to be extra careful with the cleaning process to avoid causing more damage. If you have a really tough stain to remove, this is a good option.
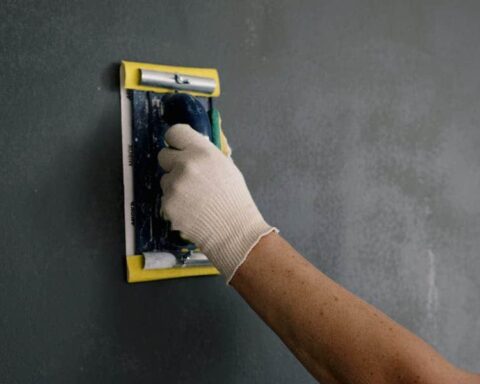
Sanding
While it’s not the gentlest solution, sanding the surface to remove burnt marks is an effective way to remove them. The key here is to be extra careful when sanding wood. Avoid sanding all the way through the surface as this will create more damage than it will fix. You’ll want to sand down to the level of the wood’s pores. Again, this will help stop water stains from occurring. Be careful not to sand too hard and cause the wood to splinter. If the blemish is really deep, you may want to consider sanding it down to the bare wood and using stains to color the surface. This way, you’ll get a consistent look. If the blemish is less severe, you can use sandpaper of different grades to remove the burnt marks without sanding through the entire layer of finish.
Paint over it
If you’re dealing with a very small mark, you may be able to paint over it. This will help minimize the appearance of the blemish and make it less noticeable. Keep in mind that the paint will likely be a different color than the rest of the piece, but it may be worth it if the mark is super noticeable. To do this method, you’ll want to use latex paint that’s water-based. Oil-based paints will cause the mark to become worse over time because they’re harder to clean. You’ll want to run a test on a small area before painting over the mark to make sure the paint won’t react with the surface. If you’re dealing with a bigger mark, you may want to consider covering the mark with decorative wood pieces. This way, the mark is covered and the piece still looks great. You can use a variety of materials for this such as veneer, cork, or leather.
Veneer repair
If the mark is too large to paint over or the blemish is really deep, you may want to consider veneer repair. With this method, you’ll want to take a piece of veneer that closely matches the rest of the surface and apply glue to both sides. You’ll then apply the piece to the damaged surface and clamp it down until it dries. After the glue dries, you’ll sand it down to match the surface and finish it with a stain to blend it in. This is a great option for large marks since you can replace the veneer that was damaged instead of sanding it down to the bare wood. If the mark is really deep, you may want to replace a few pieces of veneer to make sure the replacement pieces are cut from the same direction. This will help the mark from becoming worse over time.
Drying oils
Drying oils are commonly used on wood surfaces to help protect them from water stains. If you’re dealing with a fresh mark, you can apply a drying oil to help prevent a stain from forming. This works especially well with light-colored wood pieces. It’s important to note that drying oils are not a permanent solution. They’re effective at preventing stains while you’re actively using the piece, but once you stop and the soil dries, the mark will return. You’ll want to reapply the oil regularly to keep the blemish from getting worse.
How To Fix Burn Marks With A Stain?
- While sanding and waxing are the best methods for fixing larger burns, smaller losses are easily covered with stains.
- Stain acts as a dye, coloring the wood where applied. It can be used to color sanded areas that are now visible in the grain of the wood.
- Using a rag or paintbrush, apply the stain to the affected area. Let it sit for a few minutes before wiping it away. Depending on the type of stain you choose, you can either leave the stain as is or finish it off with a few coats of clear finish. Depending on how dark the stain is and how much of it you apply, you might end up covering the burn mark completely.
- If you are lucky, the stain will add a new color to the wood in the burn area. In either case, the best way to fix burn marks on wood is to stain them.
How To Fix Burn Marks With Paint?
- If the burn mark is small enough, you can cover it up with a coat of paint. Bear in mind, however, that paint is designed to cover the surface of the wood, not repair it.
- If the damaged area is large, the paint will crack and peel away from the wood, leaving the burn mark exposed.
- Smaller paintbrush marks, like those caused by a paint roller, can be easily covered up with a small dab of paint.
- It is best to use paint that is close in color to the original finish. Otherwise, the paint will be noticeable when the piece is in its finished state. Large areas of damaged wood can be fixed with a touch-up paint pen.
- These pens come in many different colors, allowing you to choose the best color for your project.
- Be sure to use paint that is compatible with your current finish. Otherwise, the finish will likely peel away from the wood.
Conclusion
Burn marks on your wood projects can be a real pain. But there is good news: you can fix them. The best way to remove burn marks from wood is to sand them out. Using fine-grit sandpaper will not only remove the marks but will also smooth out the surface of the wood. This is especially useful for those who are finishing their wood with a stain. If the burn mark is small enough, you can cover it up with a coat of paint. Bear in mind, however, that paint is designed to cover the surface of the wood, not repair it. If you want to keep your projects looking their best and avoid having to re-sand areas or fix mistakes, it is important to use the correct type of wood for each project.